| Main Page - Back |
|
From SudokuWiki.org, the puzzle solver's site |

Y-Wing Strategy
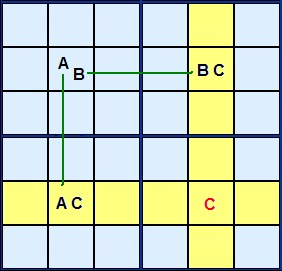
Lets look at Figure 1 for the theory.
A, B and C are three different candidate numbers in a rectangular formation. Three of the corners have two candidates AC, AB and BC. The cell marked AB is the key. If the solution to that cell turns out to be A then C will definitely occur in the lower left corner.If AB turns out to be B then C is certain to occur in the top right corner. C is a complementary pair.
It's impossible for a C to live there and it can be removed.
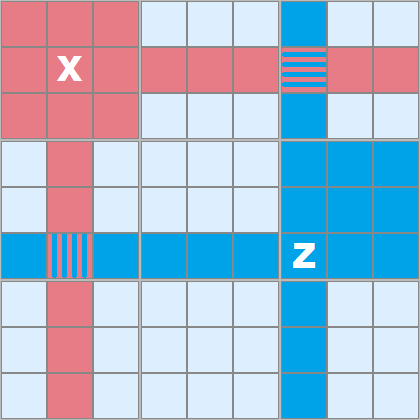
In Figure 2 I'm demonstrating the sphere of influence two example cells have, marked red and blue. X can 'see' all the red cells, Z can 'see' all the blue ones. In this case there are two cells which overlap and these are 'seen' by both.
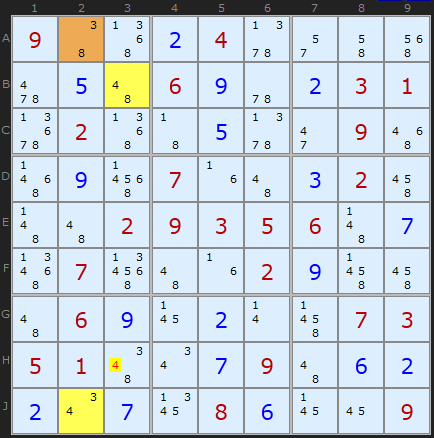
I have found a superb 'tough' Sudoku puzzle with a sequence of five Y-Wings and this illustrates the full range of this strategy. The first three are pictured here but you can load the puzzle into the solver to see the remaining examples.
The first Y-Wing finds the AB cell in A2 which links 8 with the pair on B3 and the 3 in J2. Common to both the pincer cells is 4 which must go in either B3 or J2 so 4 in H3 can be removed.
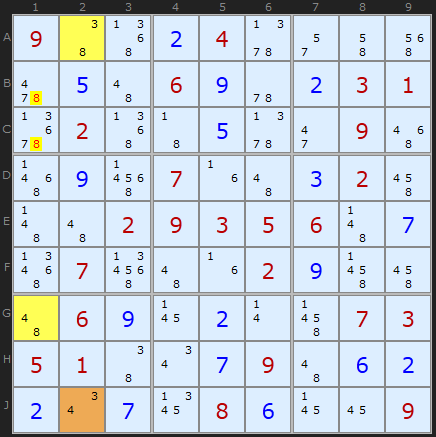
The second Y-Wing gets two candidates because of the alignment in column 1. The 8s in B1 and C1 can both see the cells A2 and G1 which also contain 8. These pincer cells are linked to the pair [4,3] in J2.
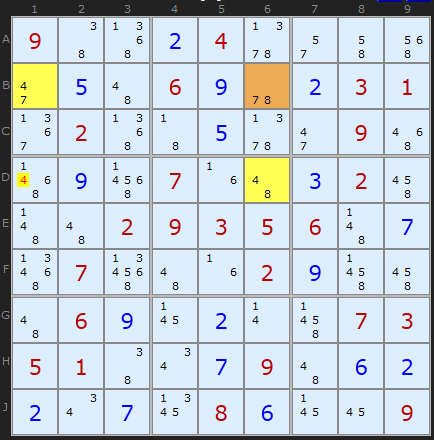
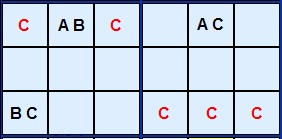
The third step is included because it shows a very neat rectangular alignment which almost mirrors the theory diagram. You couldn't ask for a clearer example. 4 must go in B1 or D6 otherwise 7 and 8 would be used up and there'd be nothing to go in B6. The 4 in D1 is the lone candidate that can see the yellow cells and should be removed.
Y-Wing Exemplars
These puzzles require the Y-Wing strategy at some point but are otherwise trivial.They also require one Naked Pair.
They make good practice puzzles.