| Main Page - Back |
|
From SudokuWiki.org, the puzzle solver's site |

Cage Comparison
Example 1
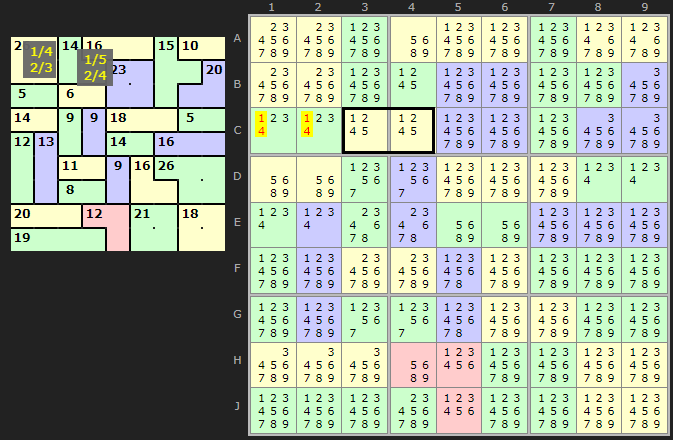
The first cage comparison strategy consists of detecting if one cage has combinations which, if set as the values for that cage, will leave another cage without any valid sets of numbers. The second target cage has to be accessible, i.e. wholly 'seen' by the first cage. And that means all the cells in both cages must be mutually 'seen' (looking along the row, column or within the same box).
Load into solver
In the first example the 2-cage on C1 has combos {1/4} and {2/3}. Along the row is a 2-cage starting at C3. This has been reduced to {1/2/4/5} in both cells leaving {1/5} and {2/4} as possible combiates. Since 1 and 4 in the first cage invalidate both these options 1 and 4 cannot be part of the cage on C1.
Example 2
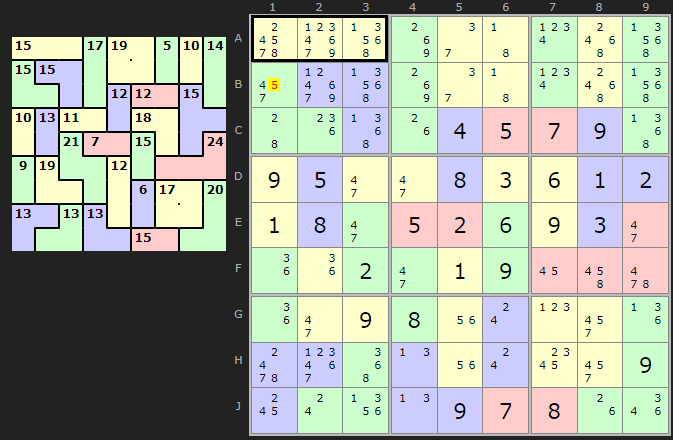
The second example shows this strategy is not confined to pair cages but they will be the most common. Here two 3-cages within the same box are compared. Usefully they have the same clue but on the face of it have a lot of combinations.
Load into solver
So the cage starting on B1 has been reduced the most and {2/5/8}, {2/6/7} and {3/4/8}. But check out {2,5,8}. If that is the solution then it affects the A1 cage:
A1 cage combo 159
A1 cage combo 168
A1 cage combo 258
A1 cage combo 267
A1 cage combo 348
A1 cage combo 456
So no combination works. We can therefore remove 5 from cage B1.
Example 3
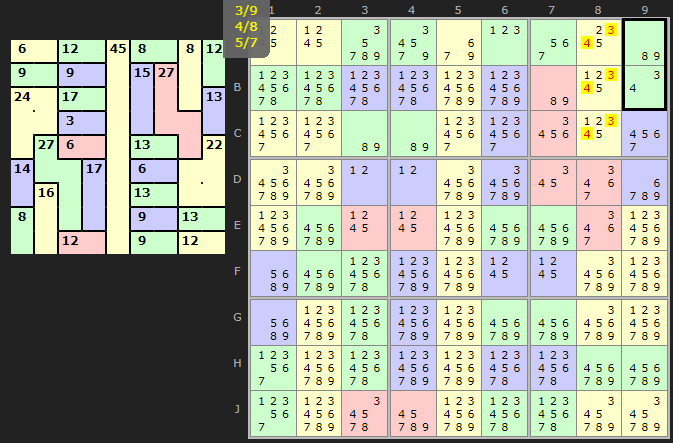
Lets look at JohnNoneDoe's latest example from 2019. Load into solver
As he writes, the 12-in-2 cage at AB9 must be {9/3} or {8/4}. Thus the 8-in-3 cage at ABC8 cannot be {1/3/4} - it must be {1/2/5} and "the solution is straightforward".
As he writes, the 12-in-2 cage at AB9 must be {9/3} or {8/4}. Thus the 8-in-3 cage at ABC8 cannot be {1/3/4} - it must be {1/2/5} and "the solution is straightforward".